


Transform Your Meditation Practice
Join thousands of meditators who've upgraded to premium advanced features with the ultimate meditation timer.
Begin meditation after:
Taking you to your completion page
Ring every:
You meditated for 10 minutes


Get started straight away
Join thousands of meditators who've upgraded to premium advanced features with the ultimate meditation timer.
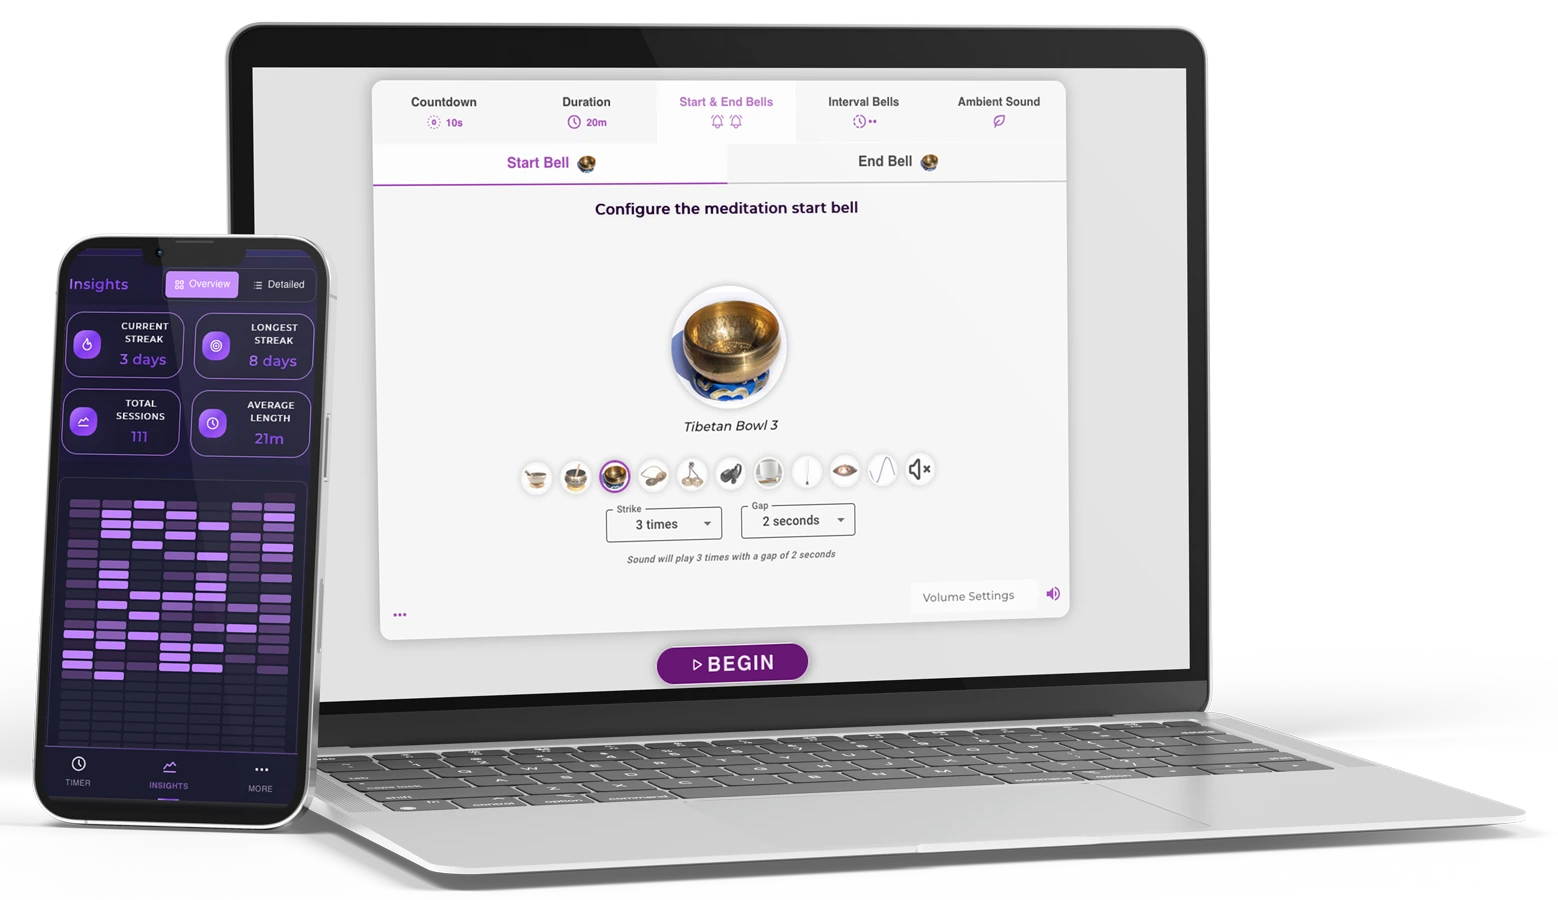
Meditation Timer Premium
Personalize your meditation space with stunning themes and colors
Track your meditation journey with insightful progress charts
Build lasting habits and never break your meditation chain
Meditate as long as you need without any restrictions
Set up to 10 intervals for perfect guided meditation sessions
Authentic Tibetan bowls, nature and ambient sounds
Everything you need
Basic features
Get the Meditation Timer mobile app for Android (iOS coming soon).
All premium features available on mobile.
Free download • Premium features included
Reflections, behind-the-scenes stories, and practical wisdom from our meditation blog.
Ultimate Guide to Symantec Norton Ghost 11.5: Creating a Bootable USB ISO
Go to Local > Partition (or Disk) > To Image . This saves the drive as a .GHO file on a separate storage device.
In the realm of system administration and IT support, reliable disk imaging tools are indispensable. Despite the advent of modern backup solutions, remains a revered, lightweight, and powerful tool for system imaging, cloning, and disaster recovery. Because version 11.5 is DOS-based, it offers unparalleled compatibility for creating sector-by-sector images of older systems, embedded devices, or Windows environments that cannot be imaged while running. symantec norton ghost 11.5 bootable iso usb
If you are reading this guide and thinking, "This is too complex," consider modern alternatives that support UEFI, NVMe drives, and Windows 11 natively:
Once the classic blue Norton Ghost interface loads, you can utilize its three primary workflows: 1. Disk to Disk Cloning Ultimate Guide to Symantec Norton Ghost 11
If you are working strictly with vintage hardware or legacy industrial PCs, an MS-DOS boot environment is highly efficient. Step 1: Download Rufus and DOS Files Open . Select your USB drive under Device .
From the Ghost main menu, choose Local → Partition → To Image . Despite the advent of modern backup solutions, remains
Accept the warning that all data on the USB device will be destroyed. Wait for the status bar to show , then close Rufus. 💻 Booting into Norton Ghost 11.5

Why I created Meditation Timer Online
Continue Reading
Exploring the concept of 'I love you' in our lives. A reflection on the power of love.
Continue Reading
Exploring the concept of 'nothing is missing' in our lives. A reflection on Lao Tzu's wisdom.
Continue Reading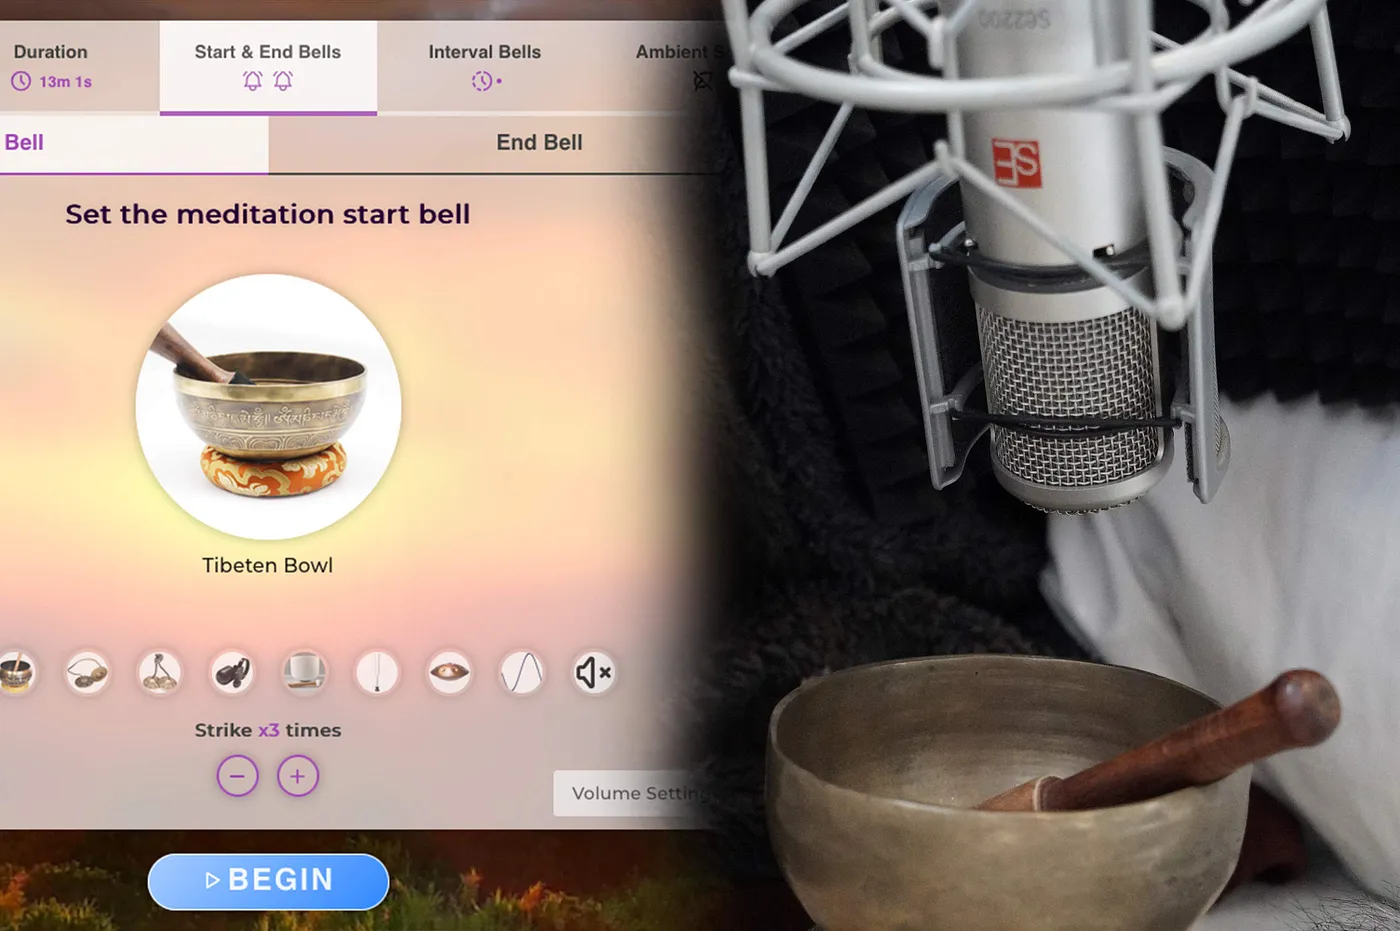
How we record the sounds for the meditation timer
Continue Reading
A reflection on Viktor Frankl's wisdom and the importance of mindfulness in our daily lives.
Continue ReadingWant to explore more meditation insights and tips?
View All ArticlesDiscover the science and benefits behind different meditation lengths. Learn which duration is right for your goals and experience level.
When you only have 60 seconds, this quick meditation can instantly reduce stress and reset your mind. Perfect for beginners and busy schedules.
Learn About 1 Min PracticeStep up from 1-minute sessions with this 2-minute meditation. Long enough for real benefits, short enough for any schedule.
Learn About 2 Min PracticePerfect for busy schedules - 5 minutes is all you need to reduce stress, improve focus, and build a daily meditation habit.
Learn About 5 Min PracticeLonger meditation practice for stress relief and improved focus. Ideal for those comfortable with shorter sessions.
Learn About 10 Min PracticeIntermediate meditation practice that develops sustained attention and deeper states of relaxation. Good for regular practitioners.
Learn About 15 Min PracticeExtended meditation practice that allows for deeper concentration and sustained mindfulness. Ideal for intermediate to advanced practitioners.
Learn About 20 Min PracticeAdvanced meditation practice for experienced practitioners. Develop sustained concentration and work with challenging emotional states.
Learn About 25 Min PracticeExtended meditation practice for experienced practitioners. Develop deep concentration and access advanced meditative states.
Learn About 30 Min PracticeNew to meditation? Start by learning about 1 or 2-minute practices and understand how to gradually build your practice.
Ultimate Guide to Symantec Norton Ghost 11.5: Creating a Bootable USB ISO
Go to Local > Partition (or Disk) > To Image . This saves the drive as a .GHO file on a separate storage device.
In the realm of system administration and IT support, reliable disk imaging tools are indispensable. Despite the advent of modern backup solutions, remains a revered, lightweight, and powerful tool for system imaging, cloning, and disaster recovery. Because version 11.5 is DOS-based, it offers unparalleled compatibility for creating sector-by-sector images of older systems, embedded devices, or Windows environments that cannot be imaged while running.
If you are reading this guide and thinking, "This is too complex," consider modern alternatives that support UEFI, NVMe drives, and Windows 11 natively:
Once the classic blue Norton Ghost interface loads, you can utilize its three primary workflows: 1. Disk to Disk Cloning
If you are working strictly with vintage hardware or legacy industrial PCs, an MS-DOS boot environment is highly efficient. Step 1: Download Rufus and DOS Files Open . Select your USB drive under Device .
From the Ghost main menu, choose Local → Partition → To Image .
Accept the warning that all data on the USB device will be destroyed. Wait for the status bar to show , then close Rufus. 💻 Booting into Norton Ghost 11.5