This plugin is life-changing. I’ve told Nicky it would be awesome to make the bass & duck communicate, and he’s done it! Just by moving the slope, I have a perfect sidechain for my kick.

Mixing in 2022 is more important than ever, especially for dance floor tracks. The kick is the most important element in most dance tracks and it really needs a proper place in your mix. This new version gives more hands on tools to shape the place of your kick in the mix, to make sure it has the perfect impact on the dance floor! Essential!
A sidechain tool I've been looking for my whole life. Thank you Nicky for letting me help during the development of the plugin. It's a must have tool!
An already powerful tool just got even better. Kickstart 2 comes with insane flexibility and awaited new features. The perfect side-chain pump plug-in just arrived… and she’s gorgeous.
This plugin is life-changing. I’ve told Nicky it would be awesome to make the bass & duck communicate, and he’s done it! Just by moving the slope, I have a perfect sidechain for my kick.
Mixing in 2022 is more important than ever, especially for dance floor tracks. This new version gives more hands on tools to shape the place of your kick in the mix, to make sure it has the perfect impact on the dance floor! Essential!
A sidechain tool I've been looking for my whole life. Thank you Nicky for letting me help during the development of the plugin. It's a must have tool!
An already powerful tool just got even better. Kickstart 2 comes with insane flexibility and awaited new features. The perfect side-chain pump plug-in just arrived… and she’s gorgeous.
Kickstart 2 instantly solves the problem of clashing, muddled kick and bass.
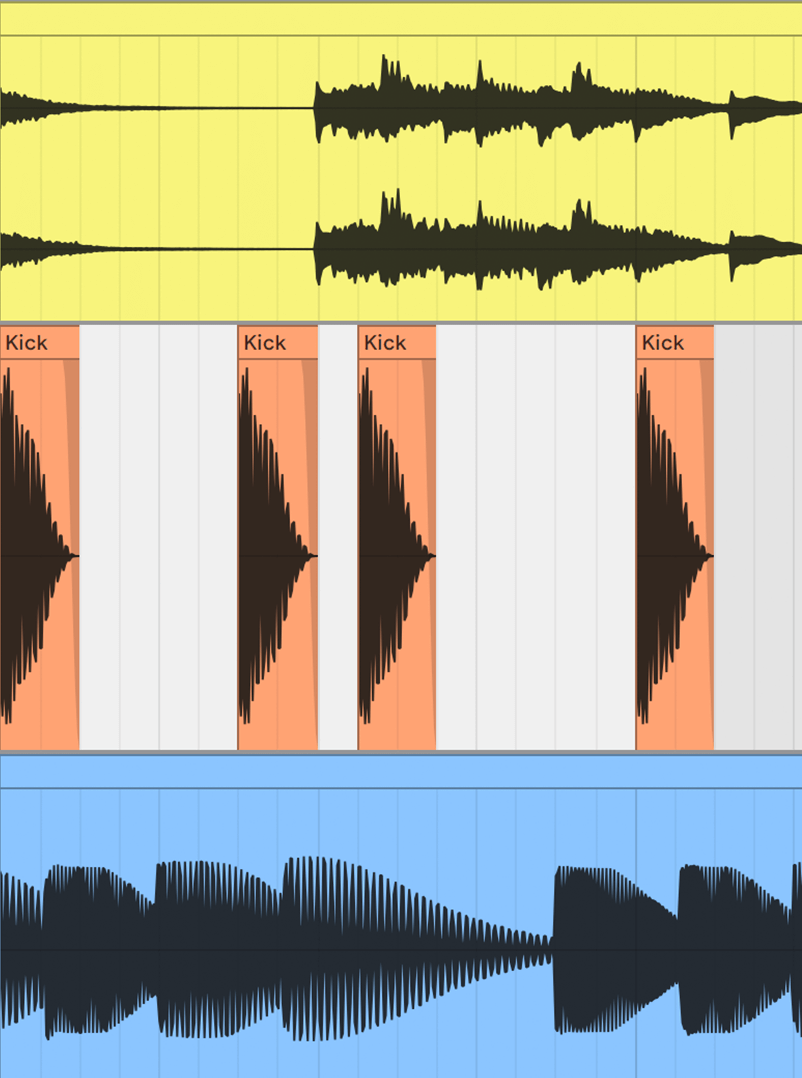
Forget fiddling about with compressors – Nicky Romero and Cableguys put everything you need for professional sidechaining into one fast, easy plugin. Just drop Kickstart on any track to instantly duck the volume with each kick drum, creating space for your bass.
Now your kick and bass will punch right through the speakers with professional impact, definition and groove. Use it for EDM, trap, house, hip-hop, techno, DnB – anything.

Use Kickstart in any DAW, for any style of music. EDM, trap, house, hip-hop, techno, DnB, and beyond
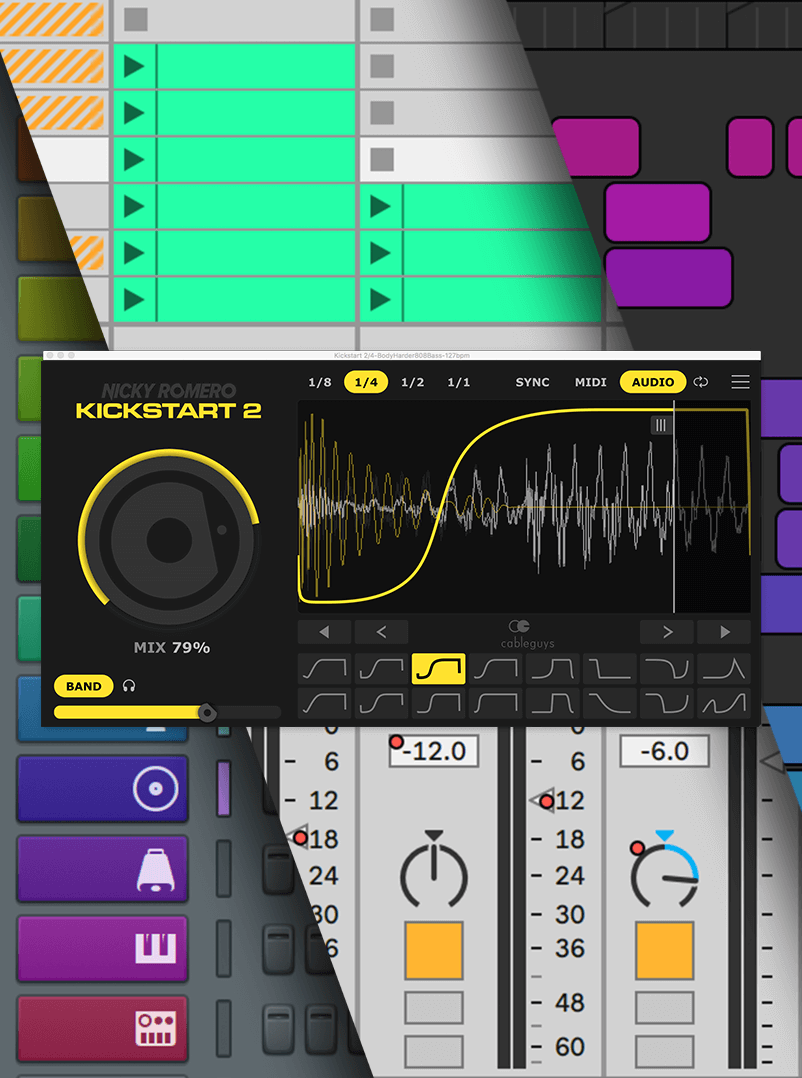
Add Kickstart – instantly get sidechain ducking, with no setup
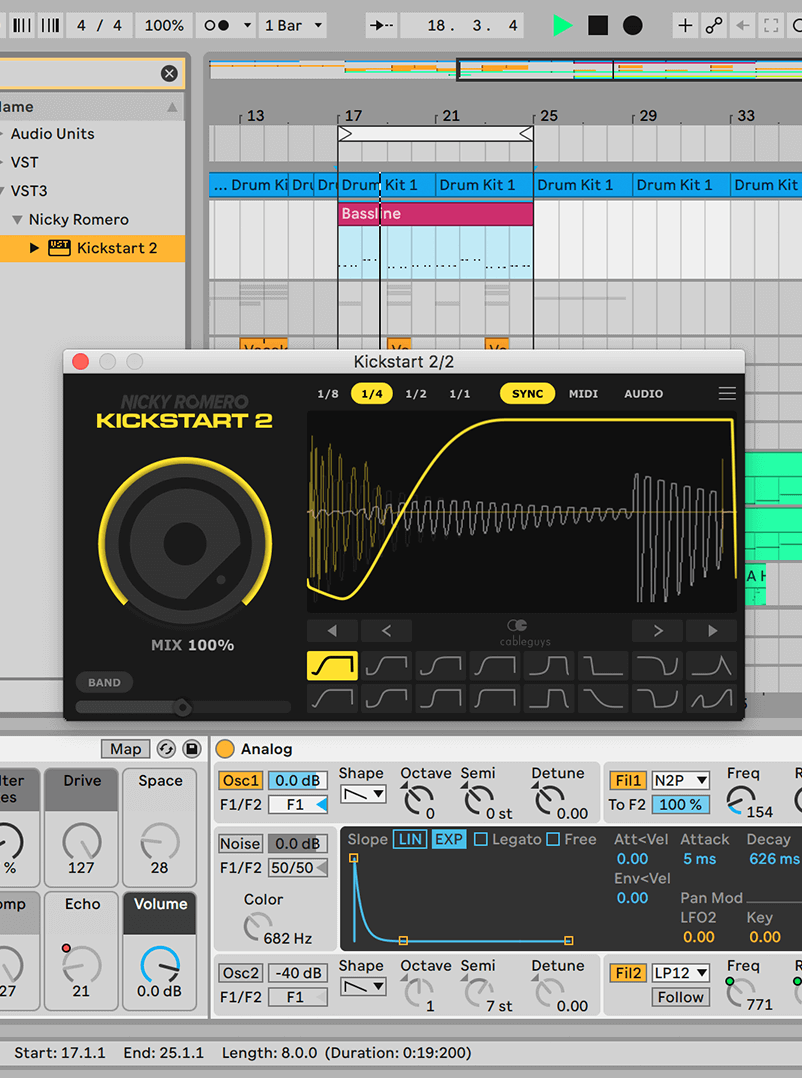
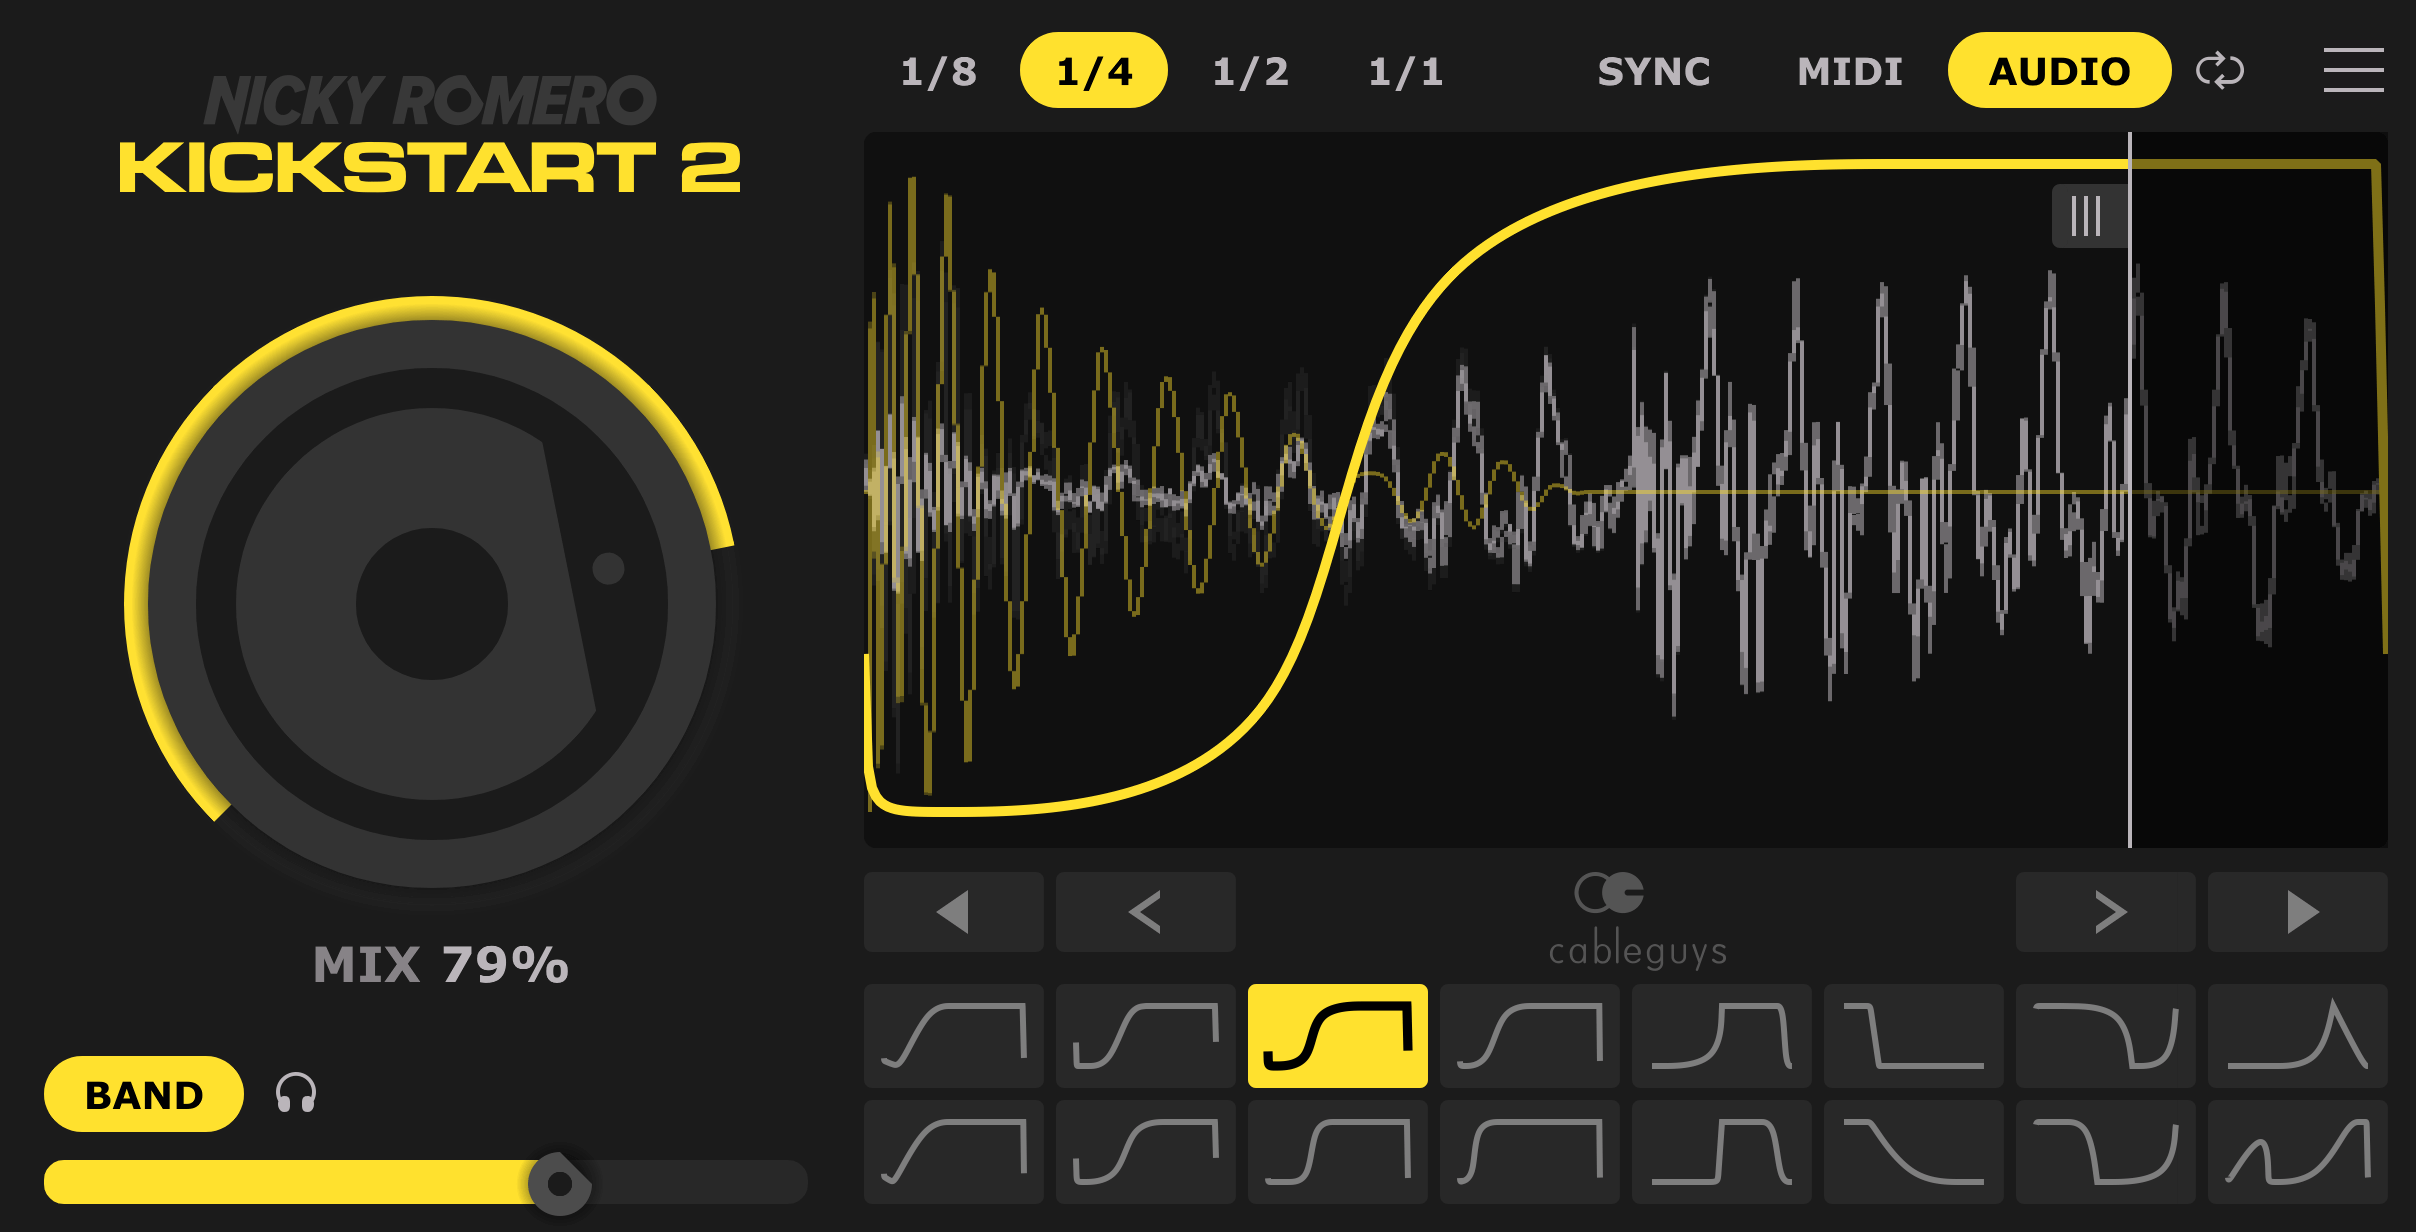
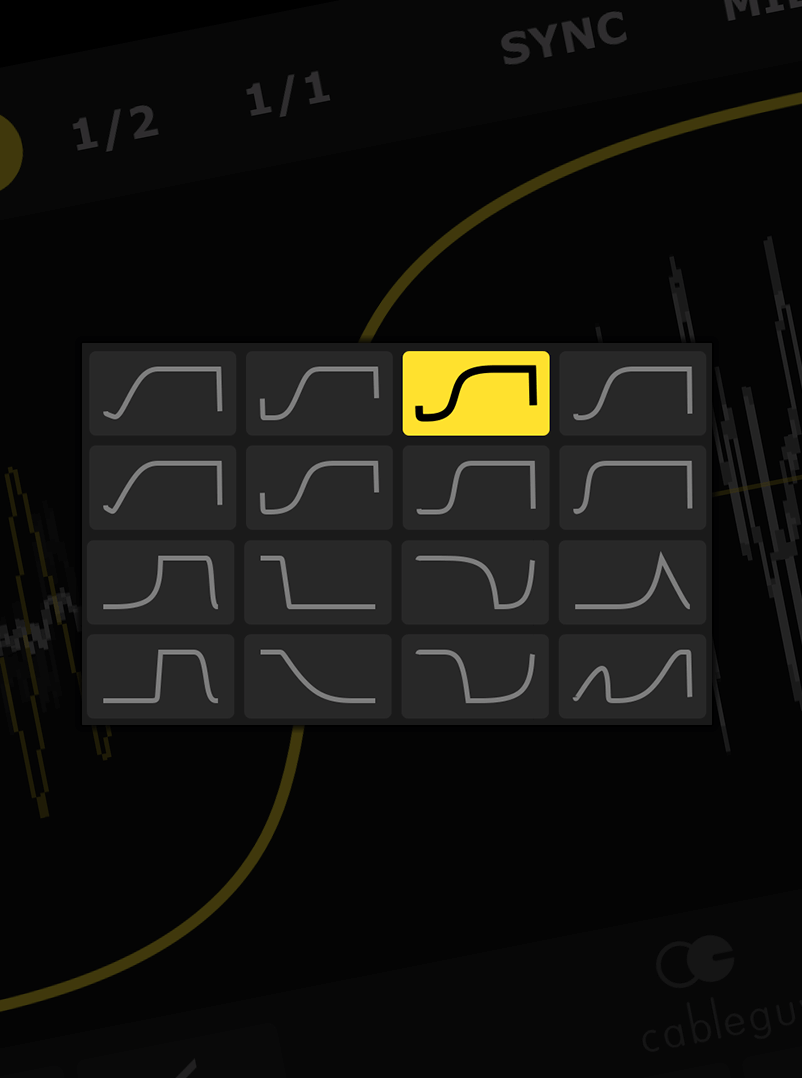
The exact curves Nicky Romero uses to get tracks sounding massive in the club A well-designed 16x16 guild emblem is an essential
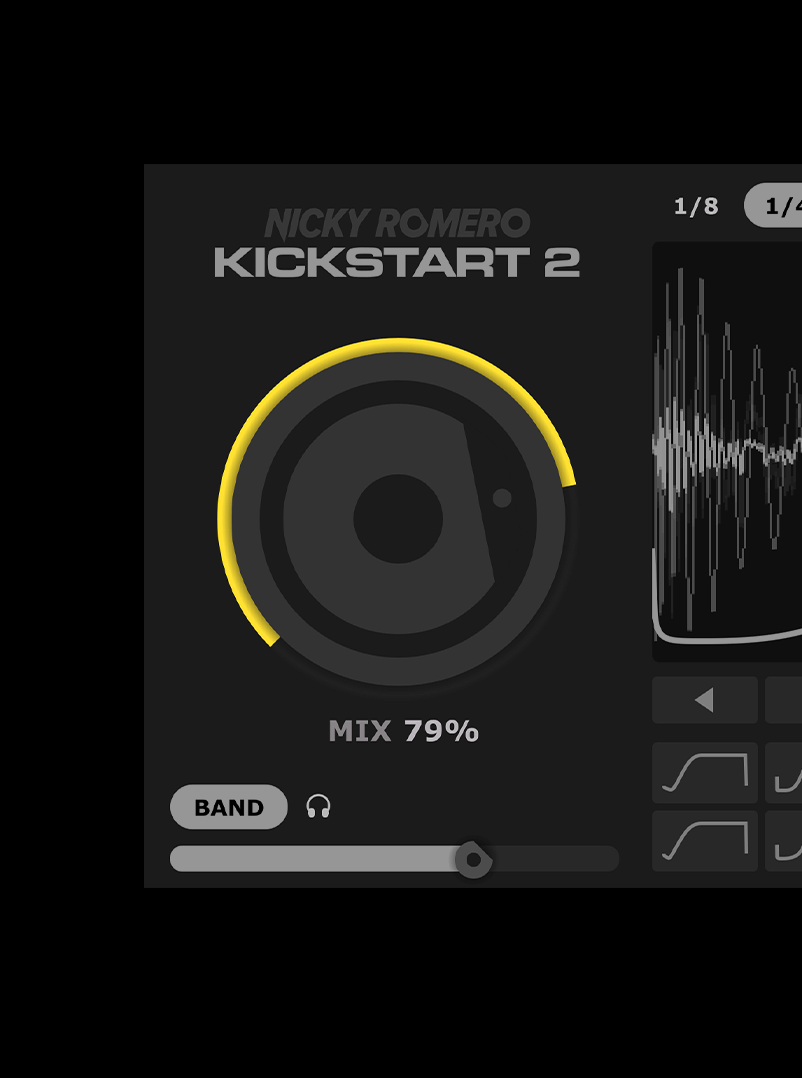
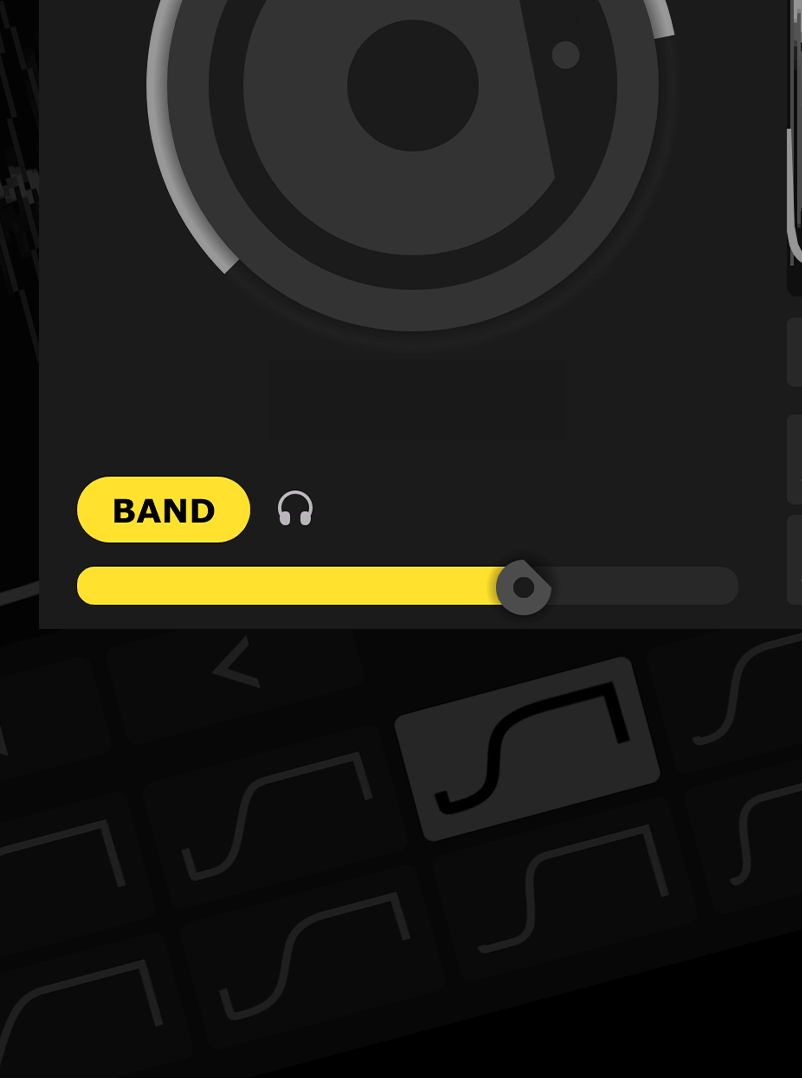
Easily adjust the strength of the sidechain effect to fit any mix
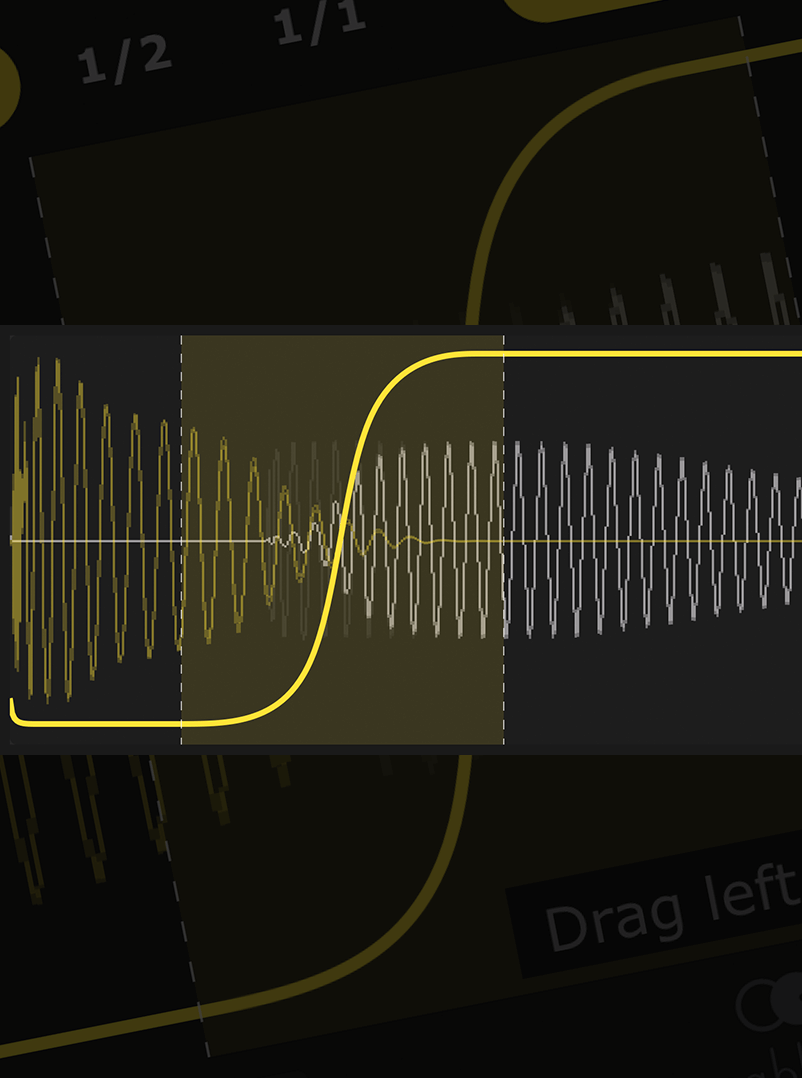
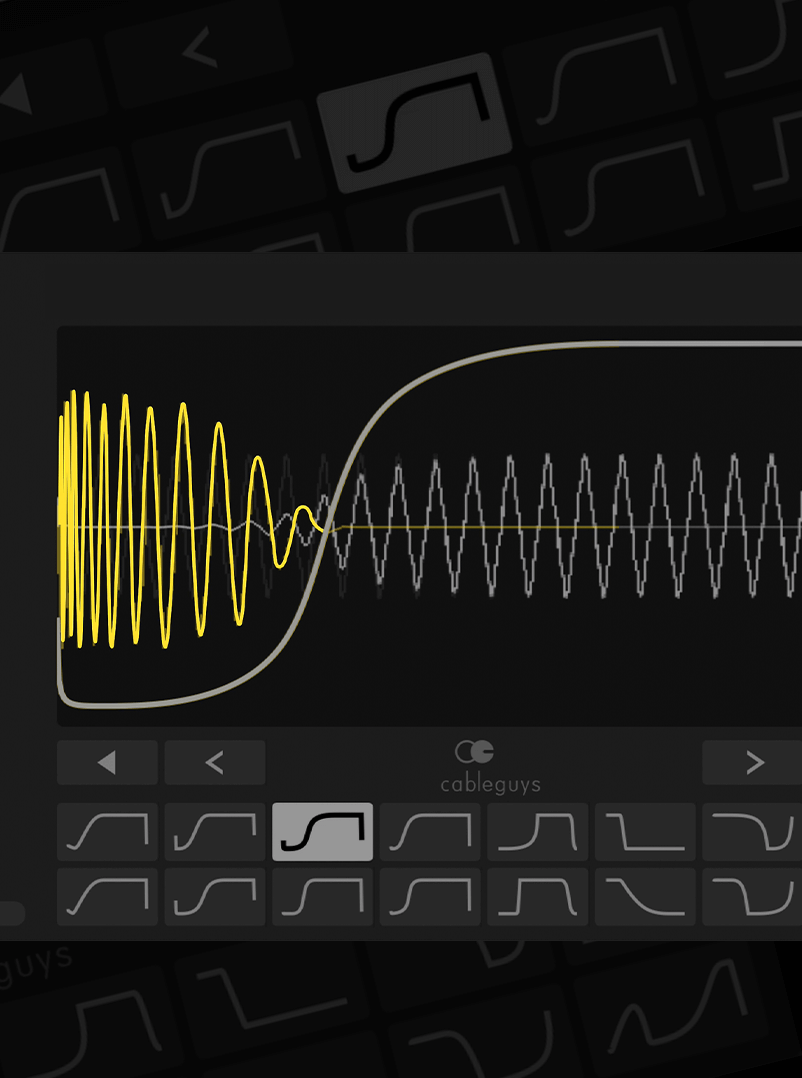
Forget complex editing tools – just drag the curve to fit any kick, long or short
Kick not 4/4? No problem – Kickstart follows any kick pattern with new Cableguys audio triggering If you don't want to design one from
Easily duck only the lows of your bassline – the pros’ secret trick for tight bass with full frequencies
See kick and bass waveforms on the same display – get your lows locked tight like never before
A well-designed 16x16 guild emblem is an essential part of any Silkroad Online guild's identity. By following the tips, tricks, and guidelines outlined in this blog post, you'll be able to create a stunning emblem that represents your guild's personality and pride. Whether you're a seasoned player or a newcomer to the world of Silkroad Online, a custom guild emblem will help your guild stand out and make a lasting impression.
If you don't want to design one from scratch, community forums like Origin Online
Do you need software recommendations for ? Share public link
Many top-tier guilds utilize both a Guild emblem and a Union emblem. A Union emblem is set by the Union Leader and takes priority, appearing in front of the Guild emblem. This allows for advanced and creative display coordination.
This guide provides a comprehensive breakdown of how to design, format, and successfully upload your . Technical Specifications Summary
If you want a professional look without the effort of designing one, many players have shared large archives of ready-to-use emblems. These are typically available for download from community forums and websites, offering thousands of designs spanning various themes, from mythological to humorous. One downloadable pack, for example, contains over 16,500 Guild and Union emblems ready to be dropped into the game folder. This is the fastest way to get a quality emblem instantly.
The background textures of Silkroad—ranging from the dusty roads of Taklamakan to the snowy peaks of Karakoram—are highly detailed. To make your emblem pop against any background, use high-contrast color palettes. Pair dark borders with vibrant neon centers, or use a stark black-and-white motif. 2. Keep It Simple
You must purchase a "Guild Emblem Registration Scroll" from the Guild Manager NPC located in any major town. Step 2: Technical Specifications for the Image File
Mastering the is a rite of passage. It is the intersection of retro pixel art, technical file formatting, and MMO community identity. Unlike modern games where you can upload any JPEG, Silkroad forces you to engage with the raw bones of digital imaging.
If you want to make sure your emblem looks perfect before uploading, let me know:
Silkroad Online does not support alpha channel transparency (like a transparent PNG). Instead, the game engine reads a specific color code as "invisible."
Because the game requires a tiny , creating a recognizable and striking design can be incredibly challenging. This comprehensive guide covers everything you need to know to design, format, and successfully upload your "Guild Emblem Silkroad 16x16" without errors. 📋 Requirements for Silkroad Guild Emblems
Once you've created your 16x16 guild emblem, it's time to upload and set it in Silkroad Online. Here's a step-by-step guide: